
Portable Ultrasonic Flaw Detector
| Place of Origin: | Zhejiang |
|---|
Company Profile
| Location: | Guangzhou, Guangdong, China (Mainland) |
|---|---|
| Business Type: | Manufacturer |
| Main Products: | Concrete Test Hammer, Portable Hardness Tester, Brinell Hardness Tester |
Product Detail
| Model No.: | MFD800C |
|---|
Product Description
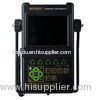
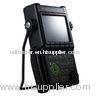
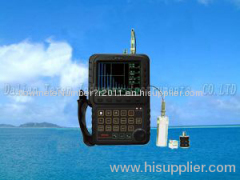
Portable Digital Ultrasonic Flaw Detector Aws Standard B Scan For Welding Inspection MFD800C
Advanced Ultrasonic Flaw Detector MFD800C AWS standard B scan
Description:
The MFD800C is an advanced digital ultrasonic flaw detector featuring a multi-color TFT LCD and a host of new features to meet challenging inspection requirements. It combines powerful flaw detection and measurement capabilities, extensive data storage, and the ability to transfer detailed inspection data to the PC via its high-speed USB port.
The instrument incorporates many advanced signal processing features including a 15MHz RF bandwidth to permit testing of thin materials, narrowband filters to improve signal to noise in high gain applications, a spike pulser for applications requiring higher frequencies, and a tunable square wave pulser to optimize penetration on thick or highly attenuating materials.
Applications:
The instrument can be widely used in locating and sizing hidden cracks, voids, disbands, and similar discontinuities in welds, forgings, billets, axles, shafts, tanks and pressure vessels, turbines, and structural components.
Specifications:
- Range: 0 to 9999 mm, at steel velocity
- Material Velocity: 1000 to 9999m/s
- Display Delay: -20 to 3400 µs
- Probe Delay/Zero Offset : 0 to 99.99µs
- Sensitivity: 110 dB max in selectable resolution 0.1, 1.0, 2.0, 6.0 dB and locked.
- Test Modes: Pulse echo, dual element and thru-transmission
- Pulser: Tunable Square Wave Pulser
- Pulse Repetition Frequency ranges from 10 Hz to 1000 Hz
- Pulse Energy: 200V, 300V, 400V, 500V, 600V selectable
- Bandwidth (amplifier bandpass ): 0.5 to 15 MHz
- Gate Monitors: Two independent gates controllable over entire sweep range
- Rectification: Positive half wave, negative half wave, full wave, RF
- System Linearity: Horizontal: +/-0.2% FSW, Vertical: 0.25% FSH, Amplifier Accuracy +/-1 dB.
- Reject (suppression): 0 to 80% full screen height
- Units: Inch or millimeter
- Transducer Connections: BNC or LEMO
- Power Requirements: AC Mains 100-240 VAC, 50-60 Hz
- Operating Temperature: -10 to 50
- Storage Temperature: -30 to 50
Competitive Advantage:
- Semiautomatic two point calibration: Automated calibration of transducer zero offset and/or material velocity
- Flaw Locating:Live display Sound-path, Projection (surface distance), Depth, Amplitude,
- Flaw sizing: Automatic flaw sizing using AVG/AVG or DAC, speeds reporting of defect acceptance or rejection.
- Digital Readout and Trig. Function: Thickness/Depth can be displayed in digital readout when using a normal probe and Peam path, Surface Distance and Depth are directly displayed when angle probe is in use.
- Both the DAC and the AVG method of amplitude evaluation are available.
- AWS D1.1.
- Curved Surface Correction feature
- Crack Height Measure function
- Weld figure feature
- Magnify gate:spreading of the gate range over the entire screen width
- Video Recording and play
- Auto-gain function
- Envelope: Simultaneous display of live A-scan at 60 Hz update rate and envelope of A-scan display
- Peak Hold: Compare frozen peak waveforms to live A-Scans to easily interpret test results.
- A Scan Freeze:Display freeze holds waveform and sound path data
- B Scan display feature
Standard Package:
|
No. |
Item |
Quantity |
|
1 |
Main Body |
1 |
|
2 |
Straight Beam Probe 4P,10mm |
|


