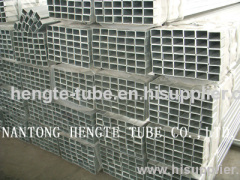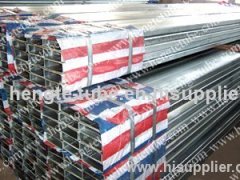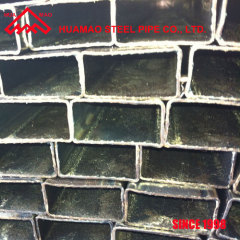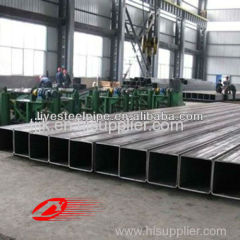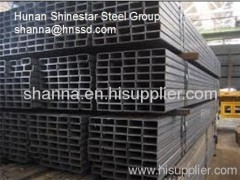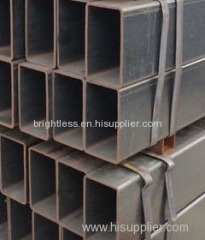
Rectangular Tube (Steel Pipe)
| Min. Order: | 1 Ton |
|---|---|
| Payment Terms: | Paypal, L/C, D/P, D/A, T/T, Money Gram |
| Supply Ability: | 10000ton |
| Place of Origin: | Hunan |
Company Profile
| Location: | Changsha, Hunan, China (Mainland) |
|---|---|
| Business Type: | Manufacturer |
Product Detail
| Means of Transport: | Land |
|---|---|
| Production Capacity: | 10000ton |
| Packing: | wooden box |
| Delivery Date: | 26-35days |
Product Description
Rectangular Tubes __________for any details, email to us:
Rectangular hollow sections are not as common as UCs and UBs. This is down to the fact that it is much more difficult to bolts it to other beams or to bolt other members to it. RHSs are described by their depth, width and wall thickness. An example is a 200 x 100 x 8 RHS, which is 200 mm deep, 100 mm wide and the wall is 8 mm thick. Hot rolled RHSs are made at the mill as one piece, whereas cold formed RHSs are made of a flat sheet rolled at right angles and welded. It is therefore easy to note the difference, as the cold rolled RHSs have a weld all along its length.
| Standard | ASTM A500, EN 10210, EN 10219, JIS G3466, BS 1387, BS 6323 PART5 |
| Grades | A500, S185, S235, S235JR, S235 G2H, S275, S275JR, S355JRH, S355J2H, St37, ST52 |
| Out diameter | 10*20mm - 600*400mm |
| Wall thickness | 0.5mm - 20mm |
Surface Conditions Special Features
Hot Rolled Hard to find sizes
Hot Rolled Pickled and Oiled Mitre cutting
Cold Rolled High strength steel on request
KleenKote Mult lengths
Standard Corner Radius(Mechanical Sizes:)
| Diameter (inch) | Wall Thickness (inch) | Radius Tolerance (inch) |
| 1/2 to 1 1/2 | 0.028 | 1/32 to 1/16 |
| 1/2 to 2 1/2 | 0.035 | 1/32 to 1/16 |
| 1/2 to 4 | 0.049 | 3/64 to 5/64 |
| 1/2 to 4 1/8 | 0.065 | 1/16 to 7/64 |
| 3/4 to 4 1/8 | 0.083 | 5/64 to 1/8 |
| over 4 1/8 to 6 | 0.095 | 3/16 to 5/16 |
| 1 to 4 1/8 | 0.095 | 3/32 to 5/32 |
| over 4 1/8 to 6 | 0.109 | 3/16 to 5/16 |
| 1 1/4 to 4 | 0.109 | 1/8 to 13/64 |
| over 4 to 6 | 0.120 | 3/16 to 5/16 |
| 1 1/4 to 4 | 0.120 | 3/16 to 5/16 |
| over 4 to 6 | 0.134 | 7/32 to 7/16 |
| 2 to 4 | 0.148 | 3/16 to 5/16 |
| over 4 to 8 | 0.148 | 7/32 to 7/16 |
| 2 to 8 | 0.165 | 1/4 to 1/2 |
| 2 to 8 | 0.180 | 1/4 to 1/2 |
| 2 1/2 to 4 | 0.203 | 5/16 to 9/16 |
| over 4 to 8 | 0.203 | 5/16 to 9/16 |
| 2 1/2 to 8 | 0.220 | 3/8 to 5/8 |
Standard Corner Radius(Structural Sizes:)
Max. 3 x Nominal Wall Thickness
| Mechanical Sizes | Structural Sizes | ||
| Largest Nominal Outside Dimension | Outside Tolerance at all Sides at Corners | Largest Nominal Outside Dimension | Outside Tolerance at all Sides at Corners |
| 3/16 to 5/8 | ± 0.004 | 2 1/2 and under | ± 0.020 |
| over 5/8 to 1 1/8 | ± 0.005 | over 2 1/2 to 3 1/2 | ± 0.020 |
| over 1 1/8 to 1 1/2 | ± 0.006 | over 3 1/2 to 5 1/2 | ± 0.030 |
| over 1 1/2 to 2 | ± 0.008 | over 5 1/2 | ± 1% |
| over 2 to 3 | ± 0.010 | ||
| over 3 to 4 | ± 0.020 | ||
| over 4 to 6 | ± 0.020 | ||
| over 6 to 8 | ± 0.025 | ||
Straightness
Mechanical Sizes: Max. 1/16" in 3 feet
Structural Sizes: Max. 1/8" x Number of feet of total length divided by 5
Wall Thickness
Mechanical & Structural Sizes: ± 10% of Nominal Wall Thickness
Squareness of Sides
Mechanical Sizes: Max: ± b = c x 0.006"
b = Tolerance for out-of-square
c = Largest external dimension across flats
Structural Sizes: Adjacent sides may deviate from 90 ° by ± 2 °
Maximum Twist (Mechanical & Structural Sizes)
| Largest Dimension, inches | Max. Twist*, inches |
| over 1/2 to 1 1/2 | 0.050 |
| over 1 1/2 to 2 1/2 | 0.062 |
| over 2 1/2 to 4 | 0.075 |
| over 4 to 6 | 0.087 |
| over 4 to 8 | 0.100 |
Convexity & Concavity(Mechanical & Structural Sizes)
| Largest Nominal O.D., Inches | Tolerance ± Inches |
| 2 1/2 and under | ± 0.010 |
| over 2 1/2 to 4 | ± 0.015 |
| over 4 to 8 | ± 0.025 |
Structural Tubing A 500 Requirements
| Grades | Chemical | Physical | ||||||
| C Max. % | Mn Max. % | P Max. % | S Max. % | Cu Max. % | Tensile strength, min. psi | Yield strength, min. psi | Elongation in 2 in. | |
| B | 0.26 | / | 0.04 | 0.05 | 0.20 | 58,000 | 46,000 | 23 |
| C | 0.23 | 1.35 | 0.04 | 0.05 | 0.20 | 62,000 | 50,000 | 21 |


