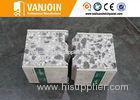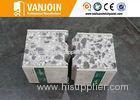

Heat Resistant Eps Cement Composite Panel Board Green Construction Material
| Place of Origin: | Guangdong |
|---|
Company Profile
| Location: | Wuhan, Hubei, China (Mainland) |
|---|---|
| Business Type: | Manufacturer |
| Main Products: | Sandwich Wall Panels |
Product Detail
| Model No.: | AIA-1 |
|---|
Product Description
Heat Resistant Eps Cement Composite Panel Board Green Construction Material
1. Usage :
(1) Internal wall (Partition Wall )
(2) Exterior Wall
(3) Roof
(4) Floor
2 . Size of wall Panel
Name | Size(L*W*T)mm | Weight (kg/m2) | Packing(pcs/m2 20’GP) | Application |
EPS Cement sandwich | 2270x610x60 | 45-48 | 315 pcs /436 m2 | Roof, interior wall |
2270x610x75 | 50-53 | 252pcs / 349 m2 | Interior wall | |
2270x610x90 | 55-58 | 207pcs / 287 m2 | Interior/exterior wall | |
2270x610x100 | 60-65 | 189pcs / 262 m2 | Interior/exterior wall | |
2270x610x120 | 65-75 | 153pcs / 212 m2 | Exterior wall | |
2270x610x150 | 80-90 | 126pcs / 175 m2 | Exterior wall |
3.Advantages of Vanjoin Sandwich panel:
Light weight: 1 person can take up two pieces of vanjoin panel.
Energy-saving, Eco-friendly: 100% non-asbestos.
Easy to install, fast construction: Can build 75-80 per day.
Strong and durable: Long life 60-70 years.
Heat insulation and preservation: Thermal conductivity: 0.221W/mk.
Sound insulation: 42 DB.
Weatherproof; windproof: 70m/s; grade 13.
Fireproof: Our sandwich wall panel can keep well under 1000 degree temperature about 4 hours.
Anti-impact, anti-earthquake: Grade 8.
Best hanging strength : Single point hanging force is > 1200 N.
Weight capacity: 400KG / square meter.
4 . Installation of EPS Cement Wall Panel:
1. Setting the line and carrying | Eject double lines of board thickness up and down the axes |
2. Sawing board | Using hand-hold electric saw to cut freely according to the |
3. Sizing | Sizing cement on tenon side of two boards, then spread |
4. Installation | Carrying the board prepared to be installed to the |
5. Correcting, fixing | Using the guiding rule of two meters to check the |
6. Grouting and filling starch | Filling the strickling the corrected wall board with |
7. Sticking fiberglass mesh (we can supply ) | After the polymer (for filling the gaps) and Wall are |
8. Installing electrical wires and switches | Setting lines on the places needing to be set with |
9. Installing doorcase | Preparing door and window holes on the installed wall, |
10. Facing coating and wall papers | Scraping putty directly without plastering on the installed |
11. Facing ceramic tile,decorative sheet | Sticking ceramic tiles or other wood facing panels |
12. Electric apparatus installation | Install lights, furniture, air-conditioners casually on |


