HAJ Type Safety Joint
| Min. Order: | 1 Piece/Pieces |
|---|---|
| Trade Term: | FOB,CFR,CIF |
| Payment Terms: | L/C, T/T |
| Supply Ability: | depend on requirement |
| Place of Origin: | Heilongjiang |
Company Profile
| Location: | Mudanjiang, Heilongjiang, China (Mainland) |
|---|---|
| Business Type: | Manufacturer |
| Main Products: | Drill Stabilizer, Kelly Valve, Sub |
Product Detail
| Model No.: | HAJ-89-229 |
|---|---|
| Brand Name: | MDX |
| Production Capacity: | depend on requirement |
| Packing: | wooden cases |
| Delivery Date: | 25days |
Product Description
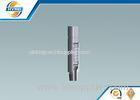
Description: The MDX Safety Joint is manufactured to provide safe and easy release and make-up whenever disengagement becomes necessary. This dependable, field-tough tool is designed to transmit torque in either direction when placed in the drill, fishing, or wash-over string.
The safety joint consists of a: Pin Section, Friction Ring, Box Section
The internal connection of the safety joint is a coarse acme thread used to facilitate easy pack-off and re-engagement. A knurled release ring between the box and pin sections maintain torsion integrity until back-off procedure is initiated. An O-ring seal contains pressure while the safety joint is made up.
Safety joints are divided into type H,type J and type AJ.
Assembly and operation
To assemble, install the safety joint in the drill string as indicated below. Make up the service connection to a torque of approximately 60 to 75% of the drill string connections.
l In drill strings, the safety joint should be located above the drill collars to avoid compression.
l In fishing strings, the safety joint should be located directly above the fishing tool but below the jar or bumper sub.
l In wash over strings, the safety joint should be located between the drill pipe and the wash over pipe. Wash over Safety Joints are provided with a tool joint box thread and a wash over pipe pin thread.
To disengage the safety joint while down-hole, place pipe in tension and apply left-hand torque. Hold torque while slowly lowering pipe until safety joint breaks. Continue to unscrew safety joint to the left. To re-engage the safety joint, lower pipe until pin section of safety joint lands on box section. Apply one point of weight. Rotate to the left one or two turns. Then rotate to the right until torque builds up, indicating safety joint is made up.