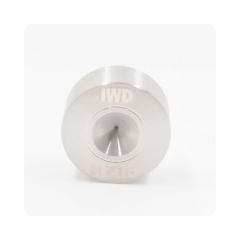
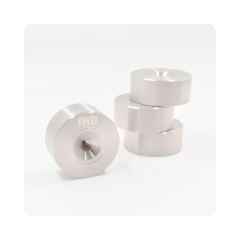
Customized Manufacturing ND Natural Diamond Wire Drawing Dies For Wire Drawing Machine
| Min. Order: | 1 Piece/Pieces |
|---|---|
| Trade Term: | FOB |
| Payment Terms: | T/T, Money Gram |
| Supply Ability: | 5000 |
| Place of Origin: | Henan |
Company Profile
| Location: | Zhengzhou, Henan, China (Mainland) |
|---|---|
| Business Type: | Manufacturer |
Product Detail
| Model No.: | ND Wire Dies |
|---|---|
| Means of Transport: | Air |
| Product Material: | Metal |
| Product: | Others |
| Shaping Mode: | Extrusion Mould |
| Brand Name: | IW |
| Application: | Wire Drawing Industry |
| Mould material: | Natural Diamond |
| Production Capacity: | 5000 |
| Packing: | Carton/ OEM pack |
| Delivery Date: | 7 |
Product Description
| Natural Diamond Wire Drawing Dies | ||||||||
| ||||||||
|

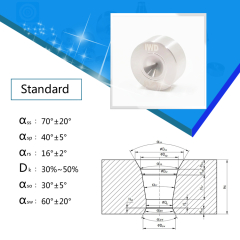
| α(ss)Entrance | The inlet area is polished so that the drawing fluid can circulate smoothly |
| α(sp)Approach | The lubrication area is finely polished, so that the wire can be easily excessive |
| α(rs)Reduction | The working area can reduce the drawing force, and the change-point contact is face-to-face angle drawing, which reduces friction and die wear. The deformed structure is more reasonable and stable. The upper line can be drawn smoothly when the incoming line becomes thicker or thinner. |
| d(k)Bearing | The fixed warp area can ensure the precise diameter, smoothness and out-of-roundness of the wire for a long time. |
| α(so)Back Relief | The safety angle can ensure that the wire is drawn without scratches, and the life expectancy tends to be longer. |
| α(sw)Exit | The deepening of the outlet can greatly support the tensile stress of the outlet. |
Wire drawing is done by passing the metal wire through the hole of the wire drawing die, and applying a pulling force to the wire at the exit side of the die. The wire is contracted and squeezed in the die cavity and gradually becomes thinner, and its speed increases near the exit of the die hole. Since the volume of the wire is constant, the decrease in cross section makes it stretched. In the center, there is a hole of a certain shape, such as round, square, octagonal or other special shapes. When the metal is pulled through the die hole, the size becomes smaller and even the shape changes. | |

Tolerance
Diameter(inch) | Diameter(mm) | Tolerance(mm) | Roundness(mm) |
≤0.00157 | ≤0.040 | 0.0003 | 0.0002 |
0.00158-0.00393 | 0.041-0.099 | 0.0005 | 0.0003 |
0.00394-0.01968 | 0.100-0.499 | 0.001 | 0.0005 |
0.01969-0.03936 | 0.500-0.999 | 0.0015 | 0.0008 |
0.03937-0.05905 | 1.000-1.499 | 0.002 | 0.001 |
0.05906-0.08661 | 1.500-2.199 | 0.003 | 0.0015 |
0.08662-0.12992 | 2.200-3.299 | 0.004 | 0.002 |
0.12993-0.18110 | 3.300-4.599 | 0.005 | 0.0025 |
0.18111-0.22834 | 4.600-5.799 | 0.006 | 0.003 |
0.22835-0.29921 | 5.800-7.599 | 0.007 | 0.0035 |
0.18111-0.41338 | 4.600-10.499 | 0.008 | 0.004 |


