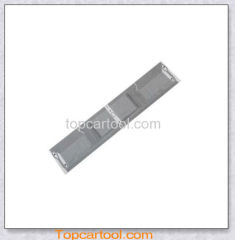
BMW radio display flat cable grey fading pixel repair kits for bmw E38 E39 X5 mid radio lcd repair
Flexible ribbon cable (also called flexible cable, flat cable) for car dashboard instrument cluster speedometer LCD display pixel failure/pixel missing/pixel disappearing/dead pixel repair
For BMW instrument cluster LCD display pixel failure repair KIT for E38 E39 M5 X5
Support cars: For BMW
Flat Ribbon Cable for BMW E38 E39 X5 MID Radio pixel failure repair E38 E39 X5 MID Radio pixel ribbon cable
Flexible ribbon cable for BMWcar E38 E39 X5 MID Radio Multi information display Radio pixel failure/pixel missing/dead pixel repair
For BMW E38 E39 X5 MID Radio Ribbon Cable for BMW E38/ E39 / E53 (5 series and X5) MID units.
For BMW MID Unit Ribbon Cable is essential for dead or fading pixel repairs.
The OBC unit on the MID console - also known as radio / telephone OBC unit on for BMW E39 and X5 models from 1996-2003 are identical, using the same LCD and the same ribbon cable. There are minor differences, like one comes with telephone button, others are witout, however the LCD and the ribbon cable is the same at all 5 series (E39) and X5 (E53) models.
For BMW MID Radio Pixel Repair Tool Installation Steps:
Firstly, Remove the for BMW Audio Meter instrument glass and bottom shell.
Secondly, Cut off the center column needles with the electric heating wire one by one.
Thirdly, Please take the dial off ,then take the remainder of the needles' transparent plastic columns out carefully.
Fourthly, Remove the old Instrument panel wire, then clean both ends of it. (Note: only can be cleaned with alcohol)
Fifthly, Cut a small triangular hole out with a small knife carefully. Then install the new Instrument panel wire alignment to the original location
Finally, Heat the Article adhesive evenly with T-iron to make cable-fused and then load it after cooling.


