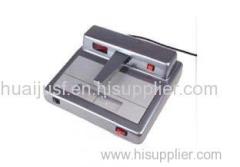

Black-White Densimeter Densitometer X-Ray Flaw Detctor Meet All International Standards
| Place of Origin: | Zhejiang |
|---|
Company Profile
| Location: | Nanning, Guangxi, China (Mainland) |
|---|---|
| Business Type: | Manufacturer |
| Main Products: | Ultrasonic Flaw Detector , Ultrasonic Thickness Gauge, Coating Thickness Gauge |
Product Detail
| Model No.: | HUA-900 |
|---|
Product Description
A Survey of the Densimeter
The densimeter developed by our company, is a quality product of computer-assisted high technology. It boasts accurate readings, high stability and easy operation. It can be widely applied to the fields such as nondestructive testing, publishing industry and medical science etc. Every densimeter is equipped with a density tablet for testing its precision.
Technology Index
Density Range
D=0.00 — 4.00(HUA-900A)
D=0.00 — 4.50(HUA-900B)
D=0.00 — 5.00(HUA-900C)
Reading Stability
±0.02
Measurement Uncertainty
0.00 — 2.00 0.02
2.00 — 4.50 0.05
4.50 — 5.00 0.08
Power Requirements
5060Hz, 220V±10%
Specifications
300×280×115(length*width*height)
Aperture Diameter
diameter 2mm
Display Format
three-digit number
SamplingTime
0.8 seconds
Operation Environment
temperature 040
relative humidity ≤85%
Power Dissipation
About 25W
Weight
About 3kg
Operating Instructions:
I, Measuring Density Values:
1, Push POWER button on the lower right corner of the densimeter after connecting it to the electricity and on the screen will appear “-.--”. It needs 5 minutes to warm up.
2, Push measuring arm down without putting any samples and on the screen will appear “E.1”. Keeping on pushing down the measuring arm while pushing the redZero Setting button on the upper right corner of the densimeter and on the screen will appear “0.00”. Releasing the measuring arm, the densimeter will enter the stage of measuring density values.
3, Align the sample with the aperture and push the measuring arm button, its density values will be shown on the screen.
4, While using the standard density tablet equipped with the instrument, the zero point should be determined first, that is, aligning the benchmark without density tablet with the aperture, pushing down the measuring arm and the Zero Setting button at the same time, start test other samples till the screen shows “0.00”.
II, Observing Samples:
The tested samples can be observed after the light on the lower left corner of the instrument is turned on and the trichromatic fluorescent lights inside the instrument are lit.
Points for Attention:
Black-white densimeter is a kind of fine measuring instrument. It should be kept away from dusts, humidity, alkaline and acid objects, and magnetic fields.
The joint between the aperture diaphragm and the light source base is relatively loose for the convenience of cleaning the dusts on them. Using the cohesive tape to pull out the aperture diaphragm first and then using writing bush to clean the dusts are strongly recommended.
The aperture diaphragm has been glued with small cohesive tape when leaving the plant. In order not to lose the diaphragm, please do not taking the cohesive tape away when moving or using the aperture diaphragm.
Please keep the density tablet clean. Use it only when you are not sure about the readings of the instrument.
When readings of density values are out of the prescribed range, the measurement data are still of reference value.

