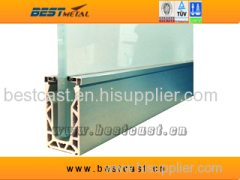
structural glass balustrade handrail
| Min. Order: | 500 Meter |
|---|---|
| Trade Term: | FOB |
| Payment Terms: | T/T |
| Supply Ability: | 10000 |
| Place of Origin: | Shandong |
Company Profile
| Location: | Dongying, Shandong, China (Mainland) |
|---|---|
| Business Type: | Manufacturer, Trading Company |
| Main Products: | Glass Balustrade Handra, Precision Casting, Rigging Hardware, Architectural Hardware, Construction Hardware |
Product Detail
| Model No.: | Best110103 |
|---|---|
| Means of Transport: | Ocean |
| Production Capacity: | 10000 |
| Delivery Date: | 45 days |
Product Description
The Structural Glass Balustrade System is our innovative aluminium channel system that holds glass panels in place for use on balustrades and partitions.
1. The aluminium base rail should be put into place, and the holes marked onto the substrate for drilling, the aluminium base rail should then be levelled and plumbed up with the use of shims. Once the shoe is plumb and level the fixings should be tightened up to make the channel rigid the fixings should be tightened in accordance with the manufacturers
2. The glass slip clamp needs to be placed on the bottom of the glass. This requires lifting the glass off the floor sufficiently to squeeze these on or turning the glass upside down. The slip clamps require spacing according to the glass thickness these are as follows :-
· All glass types require 4 clamps per metre
so number one should be in 125mm from the end of the glass and then 250mm there after.
3. Once the glass is fitted in to place you now need to press the clamp bars into the top of each glass slip clamp. These need to be put in the right way for correct and proper fit- ment this is shown in the image right.
4. Once these are in you now need to place a spirit level on the glass to get the glass plumb. These bolts now need tightening into the channel equally to keep the same pressures on the glass. To achieve this firstly plumb and level each end of the glass and tighten. Then tighten the intermediate clamp bars.Once the bolts have pinched they now require an additional quarter turn to lock the glass in place.
5. The gasket requires feeding into the smaller channels supplied. Once these are flush with each end the strip now needs to be clipped onto the top of the channel this can be done by press- ing the whole thing on evenly or working from one end which is recommended. Do not stretch the gasket.
6. Once you are happy everything is in place and the job is complete you need to clean the glass and channel we recommend the use of any stan- dard glass cleaner so long as it is not abrasive. We also recommend a soft sponge or cloth again to avoid any risk of scratching
NOTE: We have tried to make the system as simple and easy to install as possible, however should you not feel confident enough to fit this please contact a reputable glazier or builder.

