
High Quality Addis Superdry Sponge Mop Refill Head Cleaning Kitchen
1.8~1.85 USD
| Min. Order: | 3000 Piece/Pieces |
|---|---|
| Trade Term: | FOB |
| Payment Terms: | L/C, T/T, WU |
| Supply Ability: | 20000pcs/month |
| Place of Origin: | Zhejiang |
Company Profile
| Location: | Ningbo, Zhejiang, China (Mainland) |
|---|---|
| Business Type: | Manufacturer |
Product Detail
| Model No.: | AJ040 |
|---|---|
| Means of Transport: | Ocean, Air |
| Size: | 11-1/2" |
| Length: | 30cm-40cm |
| Style: | Clip On |
| Material: | Metal |
| Usage: | Home |
| Broom Head Material: | PP |
| Width: | 35cm-45cm |
| Brand Name: | Karanfil/OEM |
| Pole Material: | Steel |
| Color: | red,blue,orange ,purple,white,green |
| Dehydration rate: | 90%-100% |
| Hygroscopy: | less then 10's |
| Pole color: | Grey or white or same with the cloth color |
| Corrosion resistance: | Level 10 |
| Production Capacity: | 20000pcs/month |
| Packing: | 1pc/artwork, 12pcs/ctn, Carton size:78 X 29 X 30cm |
| Delivery Date: | 25-30 days after receive the despoit |
Product Description
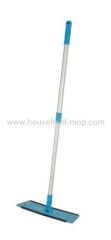
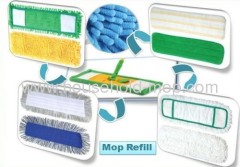
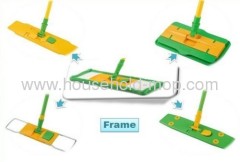
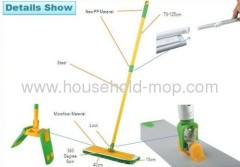
High Quality Addis Superdry Sponge Mop Refill Head Cleaning Kitchen with NO pads, frame and Pole only. This is the mop frame only for those who already have pads or want to have extra mop frames. The perfect for home use. It is constructed to use its own Dust Pads, Scrub Pads, or Grout Pads. It is lightweight and has a telescopic handle with swivel head action. Makes going around corners very easy. The Pads attach easily with Velcro strips on the bottom of the mop head. Try using it to dust walls as well as floors. This is the Mop only without pads.
Picture of High Quality Addis Superdry Sponge Mop Refill Head Cleaning Kitchen
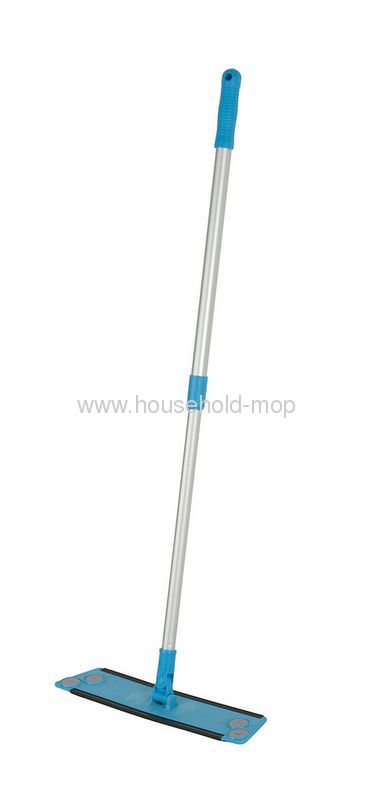

Picture of High Quality Addis Superdry Sponge Mop Refill Head Cleaning Kitchen

PRODUCT DESPRITION | |
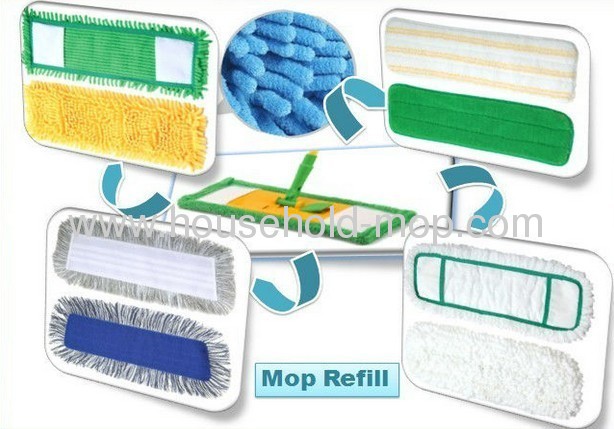
We have more than 10-year experiences on cleaning products. We are a typical China supplier and have worked for home products. We also have factories in China and Thailand in order to meet customers' needs. | |
Name | Value |
Brand | Karanfil High Quality Addis Superdry Sponge Mop Refill Head Cleaning Kitchen |
Production Capacity | 500000 Piece/Pieces per Month |
Material | Chenille and microfiber |
Terms | FOB Ningbo |
Place of Origin | China |
Feature | ECO-friendly |
Payment terms | 30% deposit before we make the production, 70% balance paid after we finished the order. |
Order delivery | 25-30days after receiving 30% deposit |
Packing | 1pcs/polybag,50pcs/inner box,1000 or 500 pcs/out carton |
Shipment means | by sea, by air, by express etc. |
DIY: Install a Heated Ceramic Floor
DIY: Install a Heated Ceramic Floor
How to Install a Heated Ceramic Floor
Over the last few years, the option of a heated ceramic floor in your home has become a must in most designing circles. Ceramic tile by nature remains cold to the touch longer than other elements in the room. When you choose to install a heated ceramic floor it gives you the beauty of ceramic tile along with a functional comfort zone.

To Start: Strip your old floor down to the cement slab, or sub-floor plywood base and clean your sub-floor thoroughly. Use a ShopVac or other high powered vacuum cleaner to remove every piece of dirt or dust that you can find. A mixture of bleach and water can be mopped on to disinfect the floor if necessary. Let the floor dry overnight.
Install Your Tiles: You can find many beautiful ceramic tile options on the market today to place over your heated ceramic floor unit. To put them in, spread another thin layer of self leveling cement over the dried layer on your floor and stick them down. Work in small areas at a time and grout according to directions when you are finished.
How To Install A Heated Ceramic Floor
Before deciding to install a heated ceramic floor unit, please understand what it is. The heated ceramic floor part of the unit looks like a heavy-duty electric blanket coil embedded into a roll of mesh background.
This roll of mesh heated ceramic floor material is rolled out into the room that you want heated. The mesh background is then cut into shape around edges or pipes to make it lay flat. Next, the mesh ceramic floor heating unit is cemented down onto the floor and tiles are installed in the normal manner over the top of it.
Electricity is then run by a qualified electrician into a wall box specifically designated for your new ceramic floor heater. You are not just assuming the cost of a heater unit and tiles; you must also hire an electrician to keep your room up to code.

To Start: Strip your old floor down to the cement slab, or sub-floor plywood base and clean your sub-floor thoroughly. Use a ShopVac or other high powered vacuum cleaner to remove every piece of dirt or dust that you can find. A mixture of bleach and water can be mopped on to disinfect the floor if necessary. Let the floor dry overnight.
Install Heating Unit: Roll out your mesh heated ceramic floor unit, or lay out your mesh ceramic floor pad pieces so that they lay flat. You may cut the fiberglass mess part of these units with scissors to make them fit around pipes, but be careful not to cut through the electrical heating element.
Cement Heating Unit: Staple your mesh roll to the plywood sub-floor, or glue it to a cement sub-floor base so that it does not move while you are working on it. You will have a part in your box called a floor sensor, put it onto your heater unit using the box pictures as a guide. Smooth a thin 1/8" layer of self leveling cement over the top of your mesh and let that dry overnight.

Install Your Tiles: You can find many beautiful ceramic tile options on the market today to place over your heated ceramic floor unit. To put them in, spread another thin layer of self leveling cement over the dried layer on your floor and stick them down. Work in small areas at a time and grout according to directions when you are finished.
Call an Electrician: Your heated ceramic floor is now ready for electricity. Never try to wire your own heated ceramic floor thermostat into your existing system without an electrician. When you do things like that yourself, you can void warranties, home owner insurance options, and create fire hazards.
While your electrician and electricians helper are standing there, remember that all small talk that you make with these people is coming out of your pocket by the hour onto each of their paychecks. If you are on a budget, the wise thing to do is to stay out of their way while they finish the installation process for your new heated ceramic floor.


