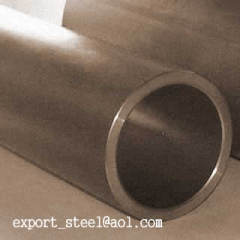
DIN seamless pipe
1000.0~3000.0 USD
| Min. Order: | 10 Ton |
|---|---|
| Trade Term: | CFR |
| Payment Terms: | L/C, D/P, T/T |
| Supply Ability: | 1000 tongs/year |
| Place of Origin: | Shanghai |
Company Profile
| Location: | Shanghai, China (Mainland) |
|---|---|
| Business Type: | Manufacturer, Distributor/Wholesaler |
| Main Products: | Seamless Pipe, Seamless Pipes, Alloy Steel Pipe, Pipe Fittings And Tube Sulutions |
Product Detail
| Means of Transport: | Ocean, Land |
|---|---|
| Production Capacity: | 1000 tongs/year |
| Packing: | in wooden boxes |
| Delivery Date: | 30 days |
Product Description
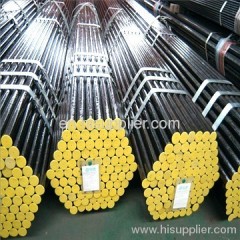
DIN seamless pipe
EN 10305, EN 10297, DIN2391 Precision Tube, EN 10210, DIN17175 St35.8, DIN1629 ST52-3
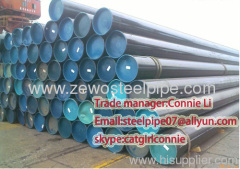
DIN/EN seamless pipes are extensively applied in petroleum, chemical, power, boiler, and machinery industries. Our prefect products and preferential price have won us customers' trust and consistently favorable comments.
Our products for DIN/EN Standard has been listed as follows:
Our products for DIN/EN Standard has been listed as follows:
- EN 10305
- EN 10297
- DIN2391 Precision Tube
- EN 10210
- DIN17175 St35.8
- DIN1629 ST52-3
DIN 1630
Steel Grade: St37.4, St44.4, St52.4
Application: Seamless Circular Tubes of Non. Alloy Steels With Very High Quality Requirements
Dimension Range: 10.2-660 mm
Steel Grade: St37.4, St44.4, St52.4
Application: Seamless Circular Tubes of Non. Alloy Steels With Very High Quality Requirements
Dimension Range: 10.2-660 mm
DIN 2391-1
Steel Grade: St35, St45, St52
Application: Seamless Precision Steel Tubes
Dimension Range: 4-260 mm
Steel Grade: St35, St45, St52
Application: Seamless Precision Steel Tubes
Dimension Range: 4-260 mm
DIN 2440
Steel Grade: St33.2
Application: Steel Tubes Medium Weight Suitable for Screwing
Dimension Range: 10.2-165.1 mm
Steel Grade: St33.2
Application: Steel Tubes Medium Weight Suitable for Screwing
Dimension Range: 10.2-165.1 mm
DIN 2441
Steel Grade:St33.2
Application: Steel Tubes Heavy Weight for Suitable for Screwing
Dimension Range: 10.2-165.1 mm
Steel Grade:St33.2
Application: Steel Tubes Heavy Weight for Suitable for Screwing
Dimension Range: 10.2-165.1 mm
DIN 2445-1
Steel Grade: St 52.4
Application: Seamless Steel Tubes Subjected to Dynamic Loading-1 Hot Finished Tubes for Use in Fluid Power Systems, Rated for Pressures from 100 bar to 500 bar
Dimension Range: 21.3-355.6 mm
Steel Grade: St 52.4
Application: Seamless Steel Tubes Subjected to Dynamic Loading-1 Hot Finished Tubes for Use in Fluid Power Systems, Rated for Pressures from 100 bar to 500 bar
Dimension Range: 21.3-355.6 mm
DIN 2445.2
Steel Grade: St 37.4
Application: Seamless Steel Tubes Subjected to Dynamic Loading-2 Precision, Tubes for Use in Fluid Power Systems, Rated for Pressures from 100 bar to 500 bar
Dimension Range: 4.50 mm
Steel Grade: St 37.4
Application: Seamless Steel Tubes Subjected to Dynamic Loading-2 Precision, Tubes for Use in Fluid Power Systems, Rated for Pressures from 100 bar to 500 bar
Dimension Range: 4.50 mm
DIN 17175
Steel Grade: St35.8, S05.8,17Mn4,19Mn5, 15Mo3, 13CrMo910, 1OCrMo910, 14MoV63, X20CrMoV12l
Application: Seamless Circular Tubes Made From Steels with Elevated Temperatures
Dimension Range: 10.2-660 mm
Steel Grade: St35.8, S05.8,17Mn4,19Mn5, 15Mo3, 13CrMo910, 1OCrMo910, 14MoV63, X20CrMoV12l
Application: Seamless Circular Tubes Made From Steels with Elevated Temperatures
Dimension Range: 10.2-660 mm
Dimension tolerance
| Standard | Tolerance | |||||||||
|---|---|---|---|---|---|---|---|---|---|---|
| Out side Diameter | Wall Thickness | Length | ||||||||
| mm | ||||||||||
| DIN 1630 | See Table 1 | See Table 2 | See Table 3 | |||||||
| DIN 2391 | See Table 4 | 10% | See Table 5 | |||||||
| DIN 2440 | See Table 6 | -12.5%, + A | ±1m | |||||||
| DIN 2441 | See Table 2 | -12.5%, + A | ±1m | |||||||
| DIN 17172 | SeeTable 7 | ≤130 | 10% | Fixed Length | ±500 | |||||
| <130 | 12.5% | |||||||||
| DIN 17173 | See Table 1 | See Table 2 | See Table 3 | |||||||
| DIN 17175 | See Table 1 | See Table 2 | See Table 3 | |||||||
| DIN 17176 | See Table 8 | See Table 2 | See Table 3 | |||||||
| DIN 17179 | See Table 1 | See Table 2 | See Table 3 | |||||||
| DIN 28180 | Outside Diameter | Class 1 | Class 2 | Class 3 | See Table 9 | ≤5000 | -0,+5 | |||
| 16-30 | ±0.08 | Not Applicable | ±0.50 | <5000 -10000 | -0,+10 | |||||
| 38 | ±0.15 | <10000 | By agreement | |||||||
| A: The upper Limit is fixed by the permissible weight deviation. | ||||||||||
Table 1: Permissible Deviation in Outside Diameter in DIN 1630, 17173, 17175, 17179
| Outside Diameter – da mm | Pertilisable Deviation in Diameter | |
|---|---|---|
| Tube Barrel and Tube Ends | At Tube ends, Subject to Particular agreement | |
| <100 td> | ±1% da; (values up to ±0.5mm are permitted) | ±0.4mm |
| 100≤da<200 td> | ±1% da | ±0.5% da. |
| ≥200 | ±1% da | ±0.6% da |
Table 2: Permissible Deviation in Wall Thickness in DIN 1630, 17173, 17175, 17176, 17179
| Permissible Deviation in Wall Thickness for Outside Diameter, da. and Wall Thicknesses, s | ||||||||
|---|---|---|---|---|---|---|---|---|
| da ≤130mm | 130mm | 320mm | ||||||
| s ≤2 | 2 | s<4 | s≤0.05da | 0.05da ≤.11da | s<0.11da. | s≤0.05da | 0.05da ≤0.09da | s<0.09da |
| +5% -10% | +12.5 %10 | ±9% | +17.5% -12.5% | ±12.5% | ±10 | +20% -15% | +15% -12.5% | +12.5% -10% |
Table 3: Types of Length and Permissible Deviation in Length in DIN 1630, 17173, 17175, 17176, 17179
| Type of Length | Premissuble Deviations in Length,mm | |
|---|---|---|
| Manfacturing Length | By agreement | |
| Specified Length | ±500 | |
| Exact Length | ≤6m | -0,+10 |
| <6-12mm | -0,+15 | |
| <12m | By agreement | |
Table 4: Permissible Deviation in Outside Diameter in DIN 2391
| Outside Diameter | Permissible Deviation | Outside Diameter | Permissible Deviation | Outside Diameter | Permissible Deviation |
|---|---|---|---|---|---|
| 4-10mm | ±0.08mm | 75-81mm | ±0.35mm | 170-180mm | ±0.90mm |
| 12-30mm | ±0.1mm | 85-90mm | ±0.40mm | 190-200mm | ±1.0mm |
| 32-40mm | ±0.15mm | 95-100mm | ±0.45mm | 220-240mm | ±1.20mm |
| 42-50mm | ±0.20mm | 110-12mm | ±0.50mm | 260mm | ±1.30mm |
| 55-60mm | ±0.25mm | 130-146m | ±0.70mm | ||
| 65-70mm | ±0.30mm | 150-160m | ±0.80mm |
Table 5: Types of Length and Permissible Deviation in Length in 2391
| Type of Length | Premissuble Deviations in Length,mm | ||
|---|---|---|---|
| Manfacturing Length | By agreement | ||
| Fixed Length | <2000 td> | ±500 | |
| ≥2000 | 10% | ||
| Exact Length | <500mm td> | -0,+2 | |
| <500-2000mm | -0,+3 | ||
| <2000-5000 | -0,+5 | ||
| <5000-7000 | -0,+10 | ||
| <7000 | By agreement | ||
Table 6: Permissible Deviation in Outside Diameter in DIN 2440, 2441
| Outside Diameter (mm) | Max (mm) | Min (mm) | Outside Diameter (mm) | Max (mm) | Min (mm) |
|---|---|---|---|---|---|
| 10.2 | 10.6 | 9.8 | 48.3 | 48.8 | 47.9 |
| 13.5 | 14.0 | 13.2 | 60.3 | 60.8 | 59.7 |
| 17.2 | 17.5 | 16.2 | 76.1 | 70.6 | 75.3 |
| 21.3 | 21.8 | 21.0 | 88.9 | 89.6 | 88.0 |
| 26.9 | 27.3 | 26.5 | 114.3 | 115.0 | 113.1 |
| 33.7 | 34.2 | 33.3 | 139.7 | 140.0 | 138.5 |
| 42.4 | 42.9 | 42.0 | 165.1 | 166.5 | 163.9 |
Table 7: Permissible Deviation in Outside Diameter in DIN 17172
| Nominal Outside Diameter-"D" (mm) | Max.Permissible Diameter Variation | |
|---|---|---|
| Pipe Body | Pipe End | |
| D<200 td> | ±1%(Values up to ±0.5mm are permissible in all case) | ±1%(Values up to ±0.5mml. are permissible in A case) |
| 200≤ D<500 td> | ±1% | ±0.7% |
| 500≤D | ±1% | 1.6mm |
Table 8: Permissible Deviation in Outside Diameter in DIN 17176
| Manufacturing Process | Limit Deviation of Outside Diameter | |
|---|---|---|
| Cold Forming | ±0.75% | |
| Hot Forming | ≤100mm | ±0.75% |
| <100-320mm | ±0.9% | |
| <320mm | ±1.0% | |
Table 9: Permissible Deviation in Wall Thickness in DIN 28180
| Tube Outside Diameter | Permisible Deviations In Wall Thickness for Thicknesses | |
|---|---|---|
| Up to 2 | Exceeding 2 | |
| Tolerance of Classes I and 2 | ±0.20 | ±10% of Wall Thickness |
| Tolerance Class 3 | ±0.20 | -10%, +15% of Wall Thickness |



.jpg)