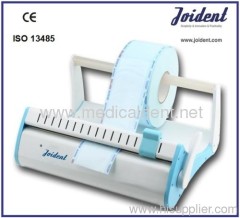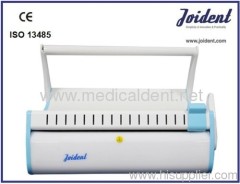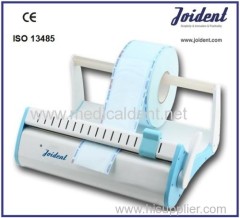
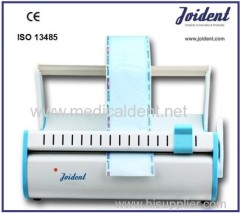
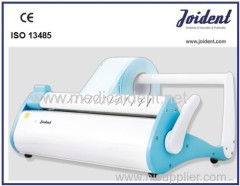
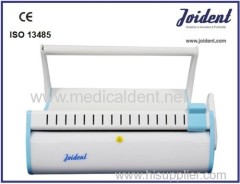
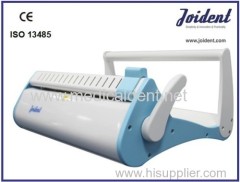

100W Power Output Autoclave Sealing Machine
1.0~500.0 USD
| Min. Order: | 10 Piece/Pieces |
|---|---|
| Trade Term: | FOB |
| Payment Terms: | L/C, T/T, WU |
| Supply Ability: | 1000pcs/month |
| Place of Origin: | Zhejiang |
Company Profile
| Location: | Ningbo, Zhejiang, China (Mainland) |
|---|---|
| Business Type: | Manufacturer |
| Main Products: | Class B Steam Sterilizers, Dental Led Curing Light, Dental Sealing Machine, Ultrasonic Cleaner, Water Distiller |
Product Detail
| Model No.: | Solo |
|---|---|
| Means of Transport: | Ocean, Air |
| Brand Name: | JOIDENT |
| Seal width: | 12mm |
| Seal length: | 300mm |
| Voltage: | AC 110/220V 50/60Hz |
| Preheating: | 2-3 minutes |
| Power output: | 100W |
| Gross weight: | 7.5kg |
| Packing size: | 460x360x170mm |
| Certificate: | CE |
| Production Capacity: | 1000pcs/month |
| Packing: | Carton |
| Delivery Date: | 15 working days |
Product Description
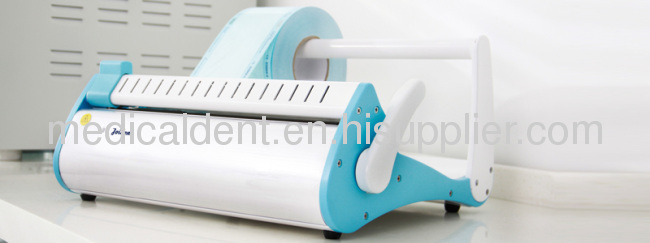
100W Power Output Autoclave Sealing Machine/Short Preheating Dental Sealer Device
Technical parameters
Solo | |||
Power input | AC 110/220V 50/60Hz | Pre-heating time | 2 –3 minutes |
Power output | 100 W | Heat preservation | Yes |
Seal width | 12mm | Dimensions (W*L*H) | 46*36*17CM |
Seal length | 30cm | Gross weight | 7.5KG |


1)Beep-alert(for heating Status);
2)Energy saving design;
3)Comes withintegrated cutting and roll support;
Solo is intended for sealing envelopes for steamsterilization. Follow strictly the instructions and orientations from themanufacturer of your packages regarding their appropriate usage, cautions,conservation and storage.
WARNING! Since the sealerworks at high temperatures, be careful not to accidentally touch its hot areas.The blades are very sharp and, in order to avoid accidents, caution is requiredwhen handling them.
1peice
Payment details
T/T, L/C & west union acceptable.
Shipment
Express: Under 10pcs samples testing, express recommended.e.g: TNT,DHL,UPS etc. Shipping days 3-5days.
Air shipment: Between 10pcs and 20pcs, Normal air shipment recommended. Shipping days 5-10days.
Sea shipment: More than 20pcs, Nor sea shipment recommended. Shipping days around 30days.

Instruction
- Connect the power cord to the power connector whichis on the back side of the sealer, check if the voltage of your equipmentmatches the voltage of the local electrical network.
- Switch the sealer on by using the power switch on itsback side and adjust the sealing temperature through the temperature selector onits right side according to the thickness of the material to be sealed. When thegreen LED goes off (after around 2 minutes) the sealer will be ready to beused.
- Place the roll on the holder. The beginning of the rollshall be inserted through the back side, between the pressure bar and thesealing bar always with the paper side down (resistance's side)and the plastic side up (directly under the upper pressurebar). Pull the sealer arm towards the operator and press it down softly until itis locked. Exaggerated pressure may break the sealer arm and this kindof damage is not covered by the warranty. The sealing time (around 4seconds) must be manually controlled by the user. Note: If thesealing temperature is too low or too high the sealing might be inefficient (theenvelopes may be stuck to the sealing area when they are pulled orbe visibly badly-sealed). To correct this, adjust the timer properly. Onceadjusted it is not necessary to perform any other adjustment to continuesealing.
- To cut the packages, still with the arm locked, slidethe blade from one side to the other, raise the sealer arm and remove theenvelopes. Note: If the blade knob is pulled slowly the papermay crease and the cutting will not be adequate. To make it more precise, pullthe blade knob quickly. If necessary, slide the cutting blade more thanonce.
Notes
- Keep the sealing platform always clean. Theaccumulation of waste on the sealing area will reduce the life cycle of theresistance and the insulating material. For an effective cleaning, wait for thesealing area to cool down and use a cloth slightly moistened withalcohol.
- If the insulating material lower tape is worn thesealer may go faulty and the resistance may be damaged. Being so, every time theresistance is replaced, please also check the insulating material tape andreplace it if it is worn.
- If it is necessary to replace the resistance or thefuse, use only those which have the same specifications as the genuineparts'.
- While packing the instruments protect the ones whichhave cutting and piercing tips with cotton or gauze to avoid the packagesrupture.
- Place the sealed envelopes with instruments into theautoclave. Check the instructions from the manufacturer of your autoclaveregarding the arrangement of the packages and the sterilization cycle.
- Unplug the power cord when servicing or cleaning theequipment.
1peice
Dimensions (W*L*H) 46*36*17 CM
Gross weight 7.5 KG
Payment details
T/T, L/C & west union acceptable.
Shipment
Express: Under 10pcs samples testing, express recommended.e.g: TNT,DHL,UPS etc. Shipping days 3-5days.
Air shipment: Between 10pcs and 20pcs, Normal air shipment recommended. Shipping days 5-10days.
Sea shipment: More than 20pcs, Nor sea shipment recommended. Shipping days around 30days.


