
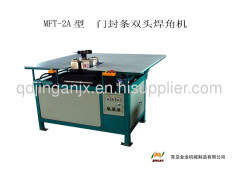
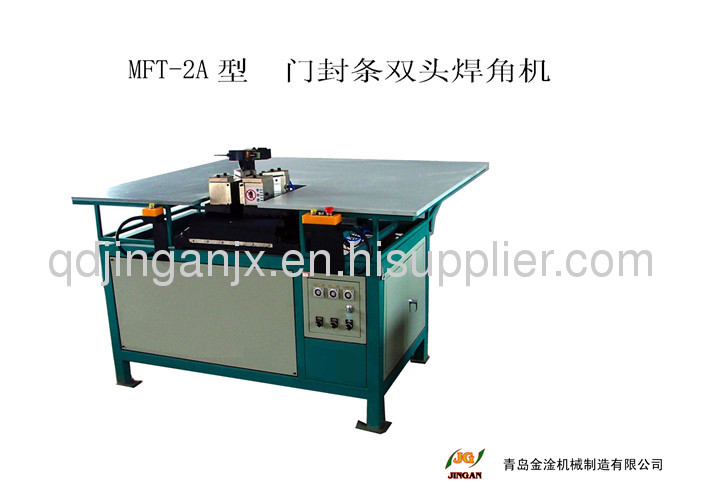
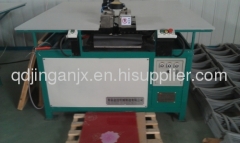
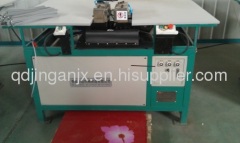
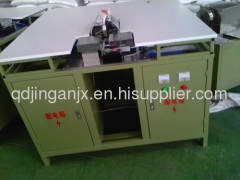
PVC auto door gasket welding machine
| Min. Order: | 5 Set/Sets |
|---|---|
| Payment Terms: | T/T |
| Supply Ability: | 20sets/month |
| Place of Origin: | Shandong |
Company Profile
| Location: | Qingdao, Shandong, China (Mainland) |
|---|---|
| Business Type: | Manufacturer, Distributor/Wholesaler |
| Main Products: | Door Seal Production Line |
Product Detail
| Model No.: | MFT-2A |
|---|---|
| Means of Transport: | Ocean |
| Plastic Type: | PVC |
| Brand Name: | JG |
| Power: | 2.1 KW |
| Total weight: | 513Kg |
| Barometric pressure: | 0.5-0.6MPa |
| Production Capacity: | 20sets/month |
| Packing: | Buyers investment |
| Delivery Date: | 1 month |
Product Description
Main Technical specifications:
number | item | norm | aunit |
1 | Total weight | 513 | Kg |
2 | Power for operation | 2.1 | KW |
3 | Power norm | AC380V/3HP/50HZ | 380V+N+PE |
4 | barometric pressure | 0.5-0.6 | MPa |
5 | work efficiency | >60 | pane/1 hour |
6 | weld cycle | 11~15 | (sec) |
7 | operating staff | 1 | (body) |
8 | overall dimension | 1820*1820*1130 | mm |
warn:
1)The electrical box placed not allowed any sundry,And should be kept clean.
2)To avoid electrical shock hazards, Please don't turn on the power of the state to open the door of the oven and touch the electrical electrical parts.
Operating instructions:
Note:
4.Moving the heater to up and down, When the heater air cylinder passes tip and tail end, checked to ensure the magnetic switch lamp with light on, and install reliable fixed; Moving the heater,make the heater to in-between position, checked to ensure the heater air cylinder magnetic switch lamp with light on, and install reliable fixed.
5.On the door of the oven in electrical have three button, Respectively is heater switch, Lighting switch and fan Switch. Open the heater switch and Lighting switch, checked to ensure the Heating indicator light lighting indicator, Whether ligh;Open the fan Switch, Check the fan to is correct; Welding time adjustable to 11 seconds,Time moves to a thimble 5 seconds,The heating time moves to 5 seconds;
7.Pneumatic system pressure is 0.5-0.6 MPA.
Note:
native machine Not Installed mould strictly prohibit to trial run!!
3.Moving the lateral module body and longitude module body,When the lateral air cylinder and longitude air cylinder passes tip and tail end, checked to ensure the magnetic switch lamp with light on, and install reliable fixed.1.This machine adopts three-phrase five-wire system to supply the power, that is 380V power and null line and PE line. before you use it,To Check The Power wire and PE wire were reliable fixed, cannotbobble.
2.Opening the electrical box check up, the five fusible cutout fuses has been connected, will air circuit breaker switch on inside the electrical box. Close the electrical box, will the main power switch hand shank turn on.
2.Opening the electrical box check up, the five fusible cutout fuses has been connected, will air circuit breaker switch on inside the electrical box. Close the electrical box, will the main power switch hand shank turn on.
FU5 Transformer output switch 9V | FU4 Transformer output switch 24V | FU3 Transformer output switch 220V | FU2 Transformer input switch L2 | FU1 Transformer input switch L1 | QF2 draught fan switch | QF1 Heater switch |
4.Moving the heater to up and down, When the heater air cylinder passes tip and tail end, checked to ensure the magnetic switch lamp with light on, and install reliable fixed; Moving the heater,make the heater to in-between position, checked to ensure the heater air cylinder magnetic switch lamp with light on, and install reliable fixed.
5.On the door of the oven in electrical have three button, Respectively is heater switch, Lighting switch and fan Switch. Open the heater switch and Lighting switch, checked to ensure the Heating indicator light lighting indicator, Whether ligh;Open the fan Switch, Check the fan to is correct; Welding time adjustable to 11 seconds,Time moves to a thimble 5 seconds,The heating time moves to 5 seconds;
notice:Thick or thin article door,The heater temperature of high and low,Heater and welding gap between die size,And heating time have close relationship,Need to make some adjustment.
6.Check the abrupt stop button is reset.7.Pneumatic system pressure is 0.5-0.6 MPA.
Moulds installation:
1.The moulds include welding mould, guiding mould and pushing mould.
2.Installation requirements:
(3)The pushing mould was reliable fixed to ensure smooth movement.
(4)The pushing cover of mould was reliable fixed to ensure that the mould movement is firm without loosing closing and opening.
Heater adjustment:
1.Adjust the distance between heater and left mould:
Machine Lubrication:
2.Start the stroke switch with double hands to close the front die and back die.
3.Insert the door sealing-trip into the welding die and over its edge 2~3mm length.
4.Start the work buttons with double hand(see below) to run auto work cycle. When the product was pushed out from die, the work cycle was over, then repeat step 1 to 3 to continue next work cycle.
Note:
1.The machine was equipped with photoelectric safe device in front of dies. During the dies closing, if the hand touch the danger area, themachine immedoately stop toprevent the hand was squeeved by dies.(Don't touch the photoelectric safe device during work cycle).When the right die and left die are closed, the photoelectric safe device lost its function.
2.When it is in emergency or work is over, push the emergency button and the machine immediately stop, including turn off the electric power and pneumatic power. if the machine is restarted, the emergency button is released and start button is pushed then go work cycle.
3.The welding period is 11-13 seconds, if the welding time set is not correct, the system will cancel one (or several) actions during automatic welding process. if in this condition, adjusting the setting time to meet 11-13 second, it'll work in normal condition.
4.If the magnetic switch is moved and can'taccept the signal, the machinedoes'twork; the machine will be checked according to item 4 to 6 of operating illustration.
5.If the photoelectric safety device has something which acts the safety function, the machine doesn't work. it should clear the photoelectric safety device to recover the machine's normal function.
6.There will be gap of fixture when the machine was used3 months. So the guiding gap is adjusted at regular time and applied the solid lubricant.
1.The moulds include welding mould, guiding mould and pushing mould.
2.Installation requirements:
(1)The right mould and left mould were reliable fixed. And the corresponding blades were and smooth.
(2)The guiding mould was reliable fixed, and alignment to ensure that gasket can be inserted smoothly and easily.(3)The pushing mould was reliable fixed to ensure smooth movement.
(4)The pushing cover of mould was reliable fixed to ensure that the mould movement is firm without loosing closing and opening.
Heater adjustment:
Moving the heater to up position which distance is 3~4mm between the right mould and left mould .
the adjustment procedure is as follows:1.Adjust the distance between heater and left mould:
(1)Adjust the distance by tipping the arm base support after the setting-screw of heater arm was loosened.
(2)tipping the heater fixture assembly after the screw of fixture assembly were loosened to reach the ideal distance between heater and left welding mould.
2.Adjust the distance between the heater and right welding mould:(2)tipping the heater fixture assembly after the screw of fixture assembly were loosened to reach the ideal distance between heater and left welding mould.
Loosen the nut of lateral air cylinder; adjust the air cylinder rod length, and then adjust the distance between heater and right welding mould.
Machine Lubrication:
The machine was equipped with precise linear bearing which life is related to the lubrication. So, the lubrication of the machine is very important. The machine should be used high speed lubricant to meet the requirement of working in high temperature environment.the lubrication requirements are as follows: 1.the lateral linear bearing and longitude linear bearing should be lubricated every shift before operating the machine.2.the movement parts of hearter and air machine, such as gear and bearing, should be lubricate onetime every week.3.the pneumatic system should be checked to ensure the oil level meeting the requirement every shift before operating. If it'snecessary, the lubricant was injected directly with oil-gun after the pipe of air cylinder was disconnected to ensure the pneumatic system normal work.
Basic operation steps:
1.First,push the emergency button,then move thedies by hand to the original position(The front die, backdie, left die and right die are in open condition)Basic operation steps:
2.Start the stroke switch with double hands to close the front die and back die.
3.Insert the door sealing-trip into the welding die and over its edge 2~3mm length.
4.Start the work buttons with double hand(see below) to run auto work cycle. When the product was pushed out from die, the work cycle was over, then repeat step 1 to 3 to continue next work cycle.
Note:
1.The machine was equipped with photoelectric safe device in front of dies. During the dies closing, if the hand touch the danger area, themachine immedoately stop toprevent the hand was squeeved by dies.(Don't touch the photoelectric safe device during work cycle).When the right die and left die are closed, the photoelectric safe device lost its function.
2.When it is in emergency or work is over, push the emergency button and the machine immediately stop, including turn off the electric power and pneumatic power. if the machine is restarted, the emergency button is released and start button is pushed then go work cycle.
3.The welding period is 11-13 seconds, if the welding time set is not correct, the system will cancel one (or several) actions during automatic welding process. if in this condition, adjusting the setting time to meet 11-13 second, it'll work in normal condition.
4.If the magnetic switch is moved and can'taccept the signal, the machinedoes'twork; the machine will be checked according to item 4 to 6 of operating illustration.
5.If the photoelectric safety device has something which acts the safety function, the machine doesn't work. it should clear the photoelectric safety device to recover the machine's normal function.
6.There will be gap of fixture when the machine was used3 months. So the guiding gap is adjusted at regular time and applied the solid lubricant.
Malfunction and Repair:
Malfunction 1: The O ring of main bar in the solenoid is broken. The muffle on the solenoid pedestal lets out gas. Turn the solenoid commutator, if the muffle changes, the O ring of the solenoid lets out gas.
Repair: change the O ring.
PVC auto door gasket welding machine
Malfunction 2: Because the time relay is used incorrectly, the heating time is too long and adjustment could not change the actual heating time. Repair: the time relay doesn't work, change the relay.
Malfunction 3: the heating tube works under high temperature may be damaged. When the heating tube is damaged, switch off the power until the heater is cold, offoad the tie-in of the heating tube fuse, offload the heating back iron and change the heating tube.
PVC auto door gasket welding machine

.jpg)