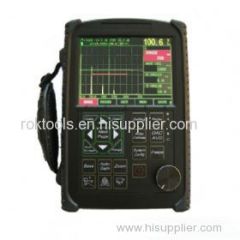
Digital Ultrasonic Flaw Detector Manufacturer
| Min. Order: | 1 Piece/Pieces |
|---|---|
| Trade Term: | FOB |
| Payment Terms: | L/C, D/P, D/A, T/T, WU |
| Supply Ability: | 1000 |
| Place of Origin: | Guangdong |
Company Profile
| Location: | China (Mainland) |
|---|---|
| Business Type: | Manufacturer, Trading Company |
Product Detail
| Model No.: | FD-510 |
|---|---|
| Means of Transport: | Ocean, Air, Land |
| Brand Name: | OEM |
| Measuring Range: | (0-9999) mm |
| Bandwidth: | (0.5 - 15) MHz |
| Material Velocity: | (1000 ~ 9999) m / s |
| Dynamic Range: | ≥ 32dB |
| Vertical linear error: | ≤ 3% |
| Horizontal linear error: | ≤ 0.2% |
| Resolution: | :> 40dB (5P14) |
| Sensitivity Leavings: | 60dB |
| Rejection: | (0 to 80)% Linear |
| Noise level: | ≤ 10% |
| Production Capacity: | 1000 |
| Packing: | Size: 263*170*61 |
| Delivery Date: | within 3weeks |
Product Description
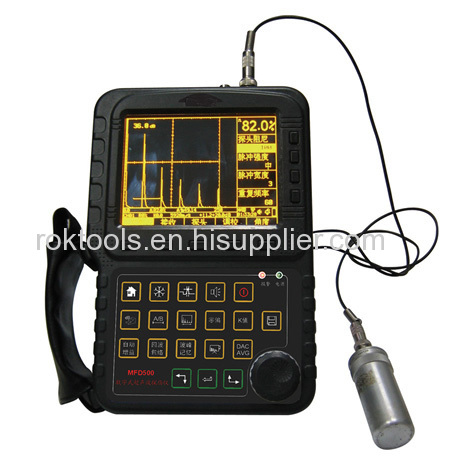
Digital Ultrasonic Flaw Detector Manufacturer FD-510
RANGE
0~ 9999mm (at steel velocity); range selectable in fixed steps or continuously variable.
PULSER
Spike excitation with low, middle and high choices of the pulse energy.
Pulse Repetition Rate: manually adjustable from 10 to 1000 Hz.
Pulse width: Adjustable in a certain range to match different probes.
Damping: 100Ω, 200Ω, 400Ω selectable to meet different resolution and sensitivity need.
Probe work mode: Single element, dual element and through transmission;
RECEIVER
Real-time sampling at 160MHz high speed enough to record the defect information.
Rectification: Positive half wave, negative halfwave, full wave, and RF
:
DB Step: 0dB, 0.1 dB, 2dB, 6dB step value as well as auto-gain mode
ALARM
Alarm with sound and light,.
MERMORY
Total 100 configuration channels store all instrument operating parameters plus DAC/AVG curve; stored configuration data can be easily previewed and recalled for quick, repeatable instrument setup. Total 1000 datasets store all instrument operating parameters plus A-scan. All the configuration channels and datasets can be transferred to PC via USB port.
FUNCTIONS
Peak Hold:
Automatically searching the peak wave inside the gate and hold it on the display.
Equivalent diameter calculation: find out the peak echo and calculate its equivalent diameter.
Continuous Record: Record the display continuously and save it to the memory inside the instrument.
Defect Localization: Localize the defect position, including the distance, the depth and its plane projection distance.
Defect Sizing: calculate the defect size
Defect Evaluation: Evaluate the defect by echo envelope.
DAC: Distance Amplitude Correction
AVG: Distance Gain Size curve function
Crack measure: Measure and calculate the crack depth
B-SCAN: Display the cross-section of the test block.
REAL-TIME CLOCK
Real time clock for tracking the time.
COMMUNICATION
USB2.0 high-speed communication port
SPECIFICATIONS
Range: (0 ~ 9999) mm
Bandwidth: (0.5 ~ 15) MHz
Material Velocity: (1000 ~ 9999) m / s
Dynamic Range: ≥ 32dB
Vertical linear error: ≤ 3%
Horizontal linear error: ≤ 0.2%
Resolution:> 40dB (5P14)
Sensitivity Leavings: 60dB (flat-bottomed deep hole 200mmФ2)
Rejection: (0 to 80)% Linear
Noise level: ≤ 10%
Power supply: DC 9V; lithium batteries work for 4 to 8 hours or more
Ambient temperature: (-20 ~ 50) ℃
Relative Humidity: (20 ~ 95)% RH
Overall dimensions: 263 × 170 × 61 (mm)
FD-510 Standard Configuration
No. | Item | Quantity |
1 | Main Body | 1 |
2 | Straight Beam Probe | 1 |
3 | Angle Probe | 1 |
4 | Machine-probe Cable (Q9-Q9) | 1 |
5 | Battery Module | 1 |
6 | Power Adapter (Charger) | 1 |
7 | Support Pillar | 1 |
8 | Manual | 1 |
9 | Instrument Case | 1 |
10 | Datapro Software | 1 |
11 | USB communication Cable | 1 |
